Getting cracking photos of your
fish is quite an important part of fly fishing. It is awesome being able to
share the surreal landscapes, magical streams and endlessly blue oceans of our
fishing experiences. And let’s not mention the being able to email all our
friends the latest bus we landed - we love to stroke our egos don’t we?
When taking photos with your own
camera, it’s easy. You know the settings, understand the focal lengths and know
how to manipulate its nuances to get the best picture. It gets a little more
complicated with a DSLR. But you learn the camera like you learn the action of
your rod coupled with your line.
But when it’s your turn to have the
pics taken of yourself, be sure to check that the settings are correct before
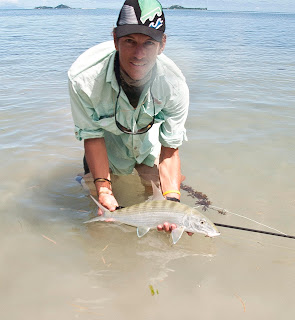
handing the camera over. After he snapped his rod today, my old man was
relegated to cameraman. I didn't realise the focus was still on manual and after
30 odd photos of a bonefish; Photoshop worked hard to sharpen, clear and fix
the images.
Dad has now had a lesson and a
practice session in the basics of using my Nikon. Hopefully the next round of
photo taking will be more of a success...
After Photoshop was employed - all
shots were edited in Camera RAW (if you have a DSLR get Photoshop and start
shooting in RAW format) - the photos are clearer and sharper. The simple steps
to cleaning up your potentially lost images are below.
Step 1: In the details tab, pump up
your sharpening, radius of sharpen and detail of sharpen.
Step 2: In the basic tab, play with
contrast and clarity.
While this is a great way to
salvage photos where your subject is a bit further away, your close-up shots
will probably stay blurred. And in general this is not a magic way of making
those blurry photos suddenly magazine cover quality. But it may just keep some
memories a little clearer!
Above and below: The before and after Photoshop

Always a great memory: sending it back...


No comments:
Post a Comment